用户中心
目的
完整了解做项目的思路,接触一些企业级的开发技术
企业做项目流程:
需求分析=> 设计(概要设计,详细设计)=> 技术选型 =>初始化 /引入需要的技术 => 写小Demo =>写 代码(实验 业务逻辑) => 测试(单元测试) => 代码提交 /代码评审 => 部署发布
需求分析
- 登录/注册
- 用户管理(仅管理员可见)对用户对查询或者修改
- 用户校验
技术选型
前端:三件套+React+组件库Ant Design +Umi +Ant Design Pro(现成的管理系统)
后端:Java+Spring+SpringMVC+Mybati+MybatisPlus+SpringBoot+MySQL
部署:服务器/容器(平台)
前端页面初始化
Ant Design Pro 官网 在这里面
初始化项目
- 运行安装命令
npm i @ant-design/pro-cli -g
pro create myapp
- 选择umi版本为 umi@3
- 安装依赖并运行:
cd myapp &&yarn
- 安装可视化界面
yarn add @umijs/preset-ui -D
- 运行项目
yarn start
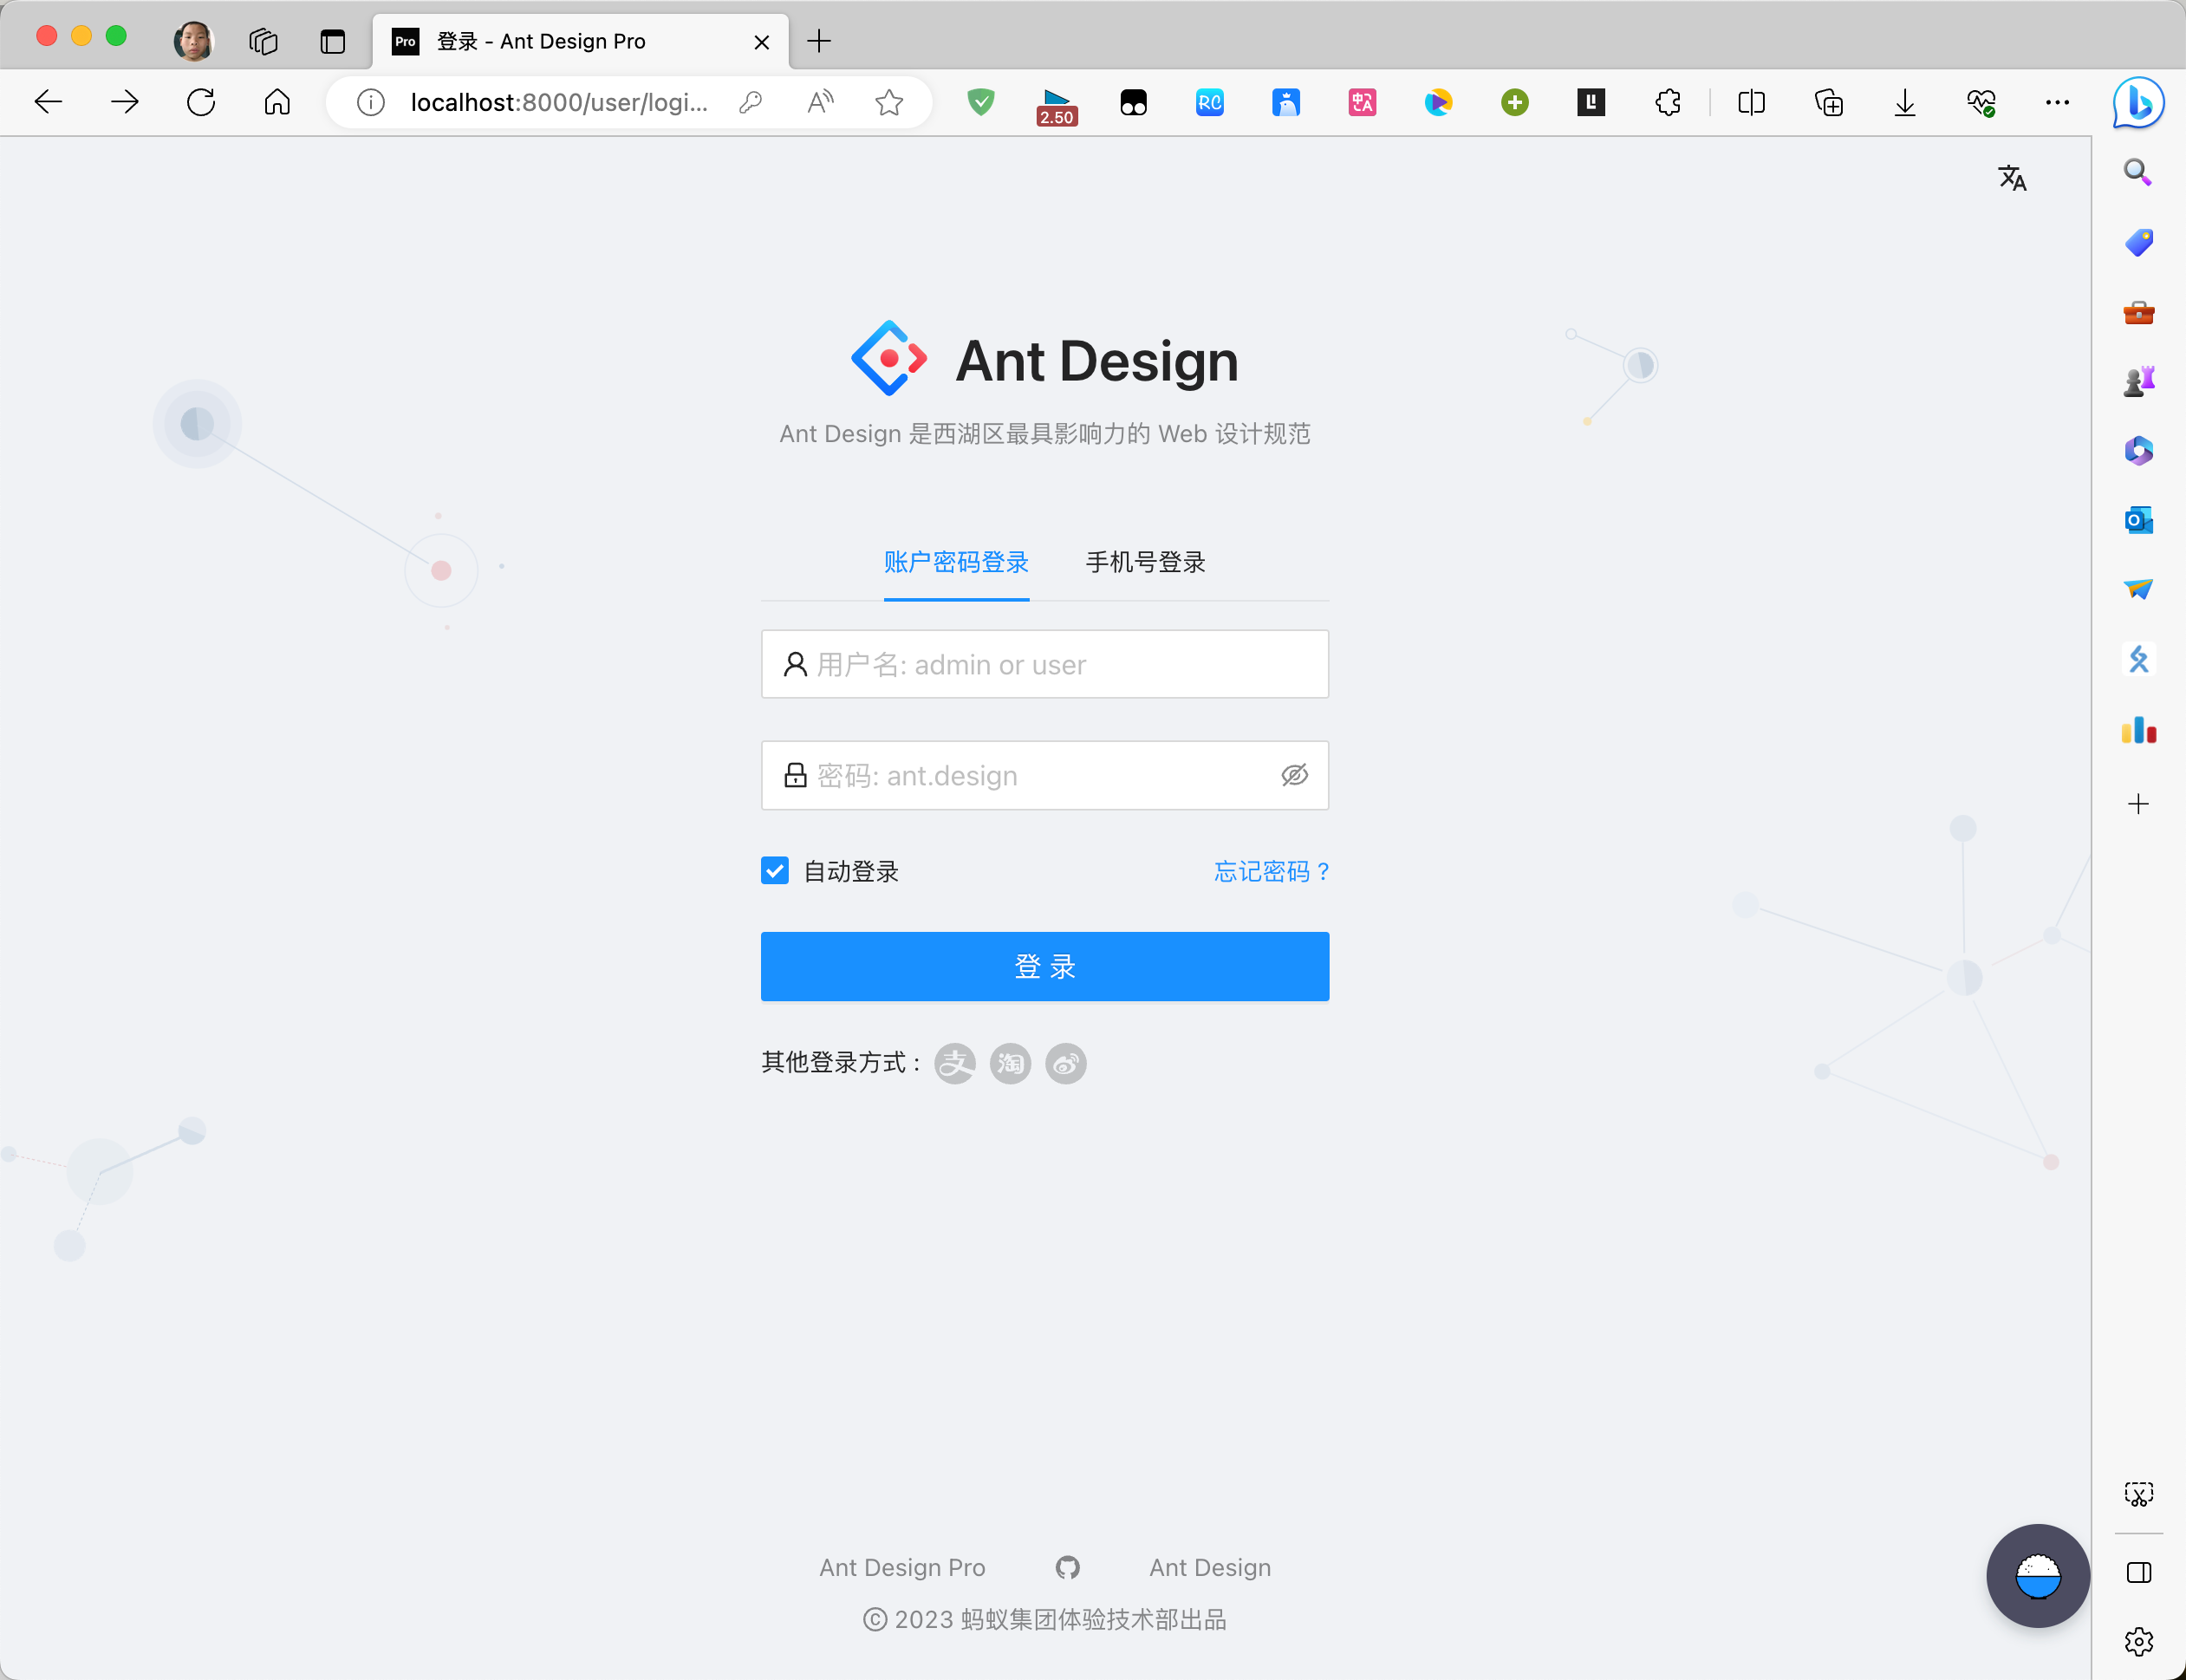
成功运行:
项目瘦身
移除一些不需要的东西:
首先移除i18多国语言
yarn i18n-remove
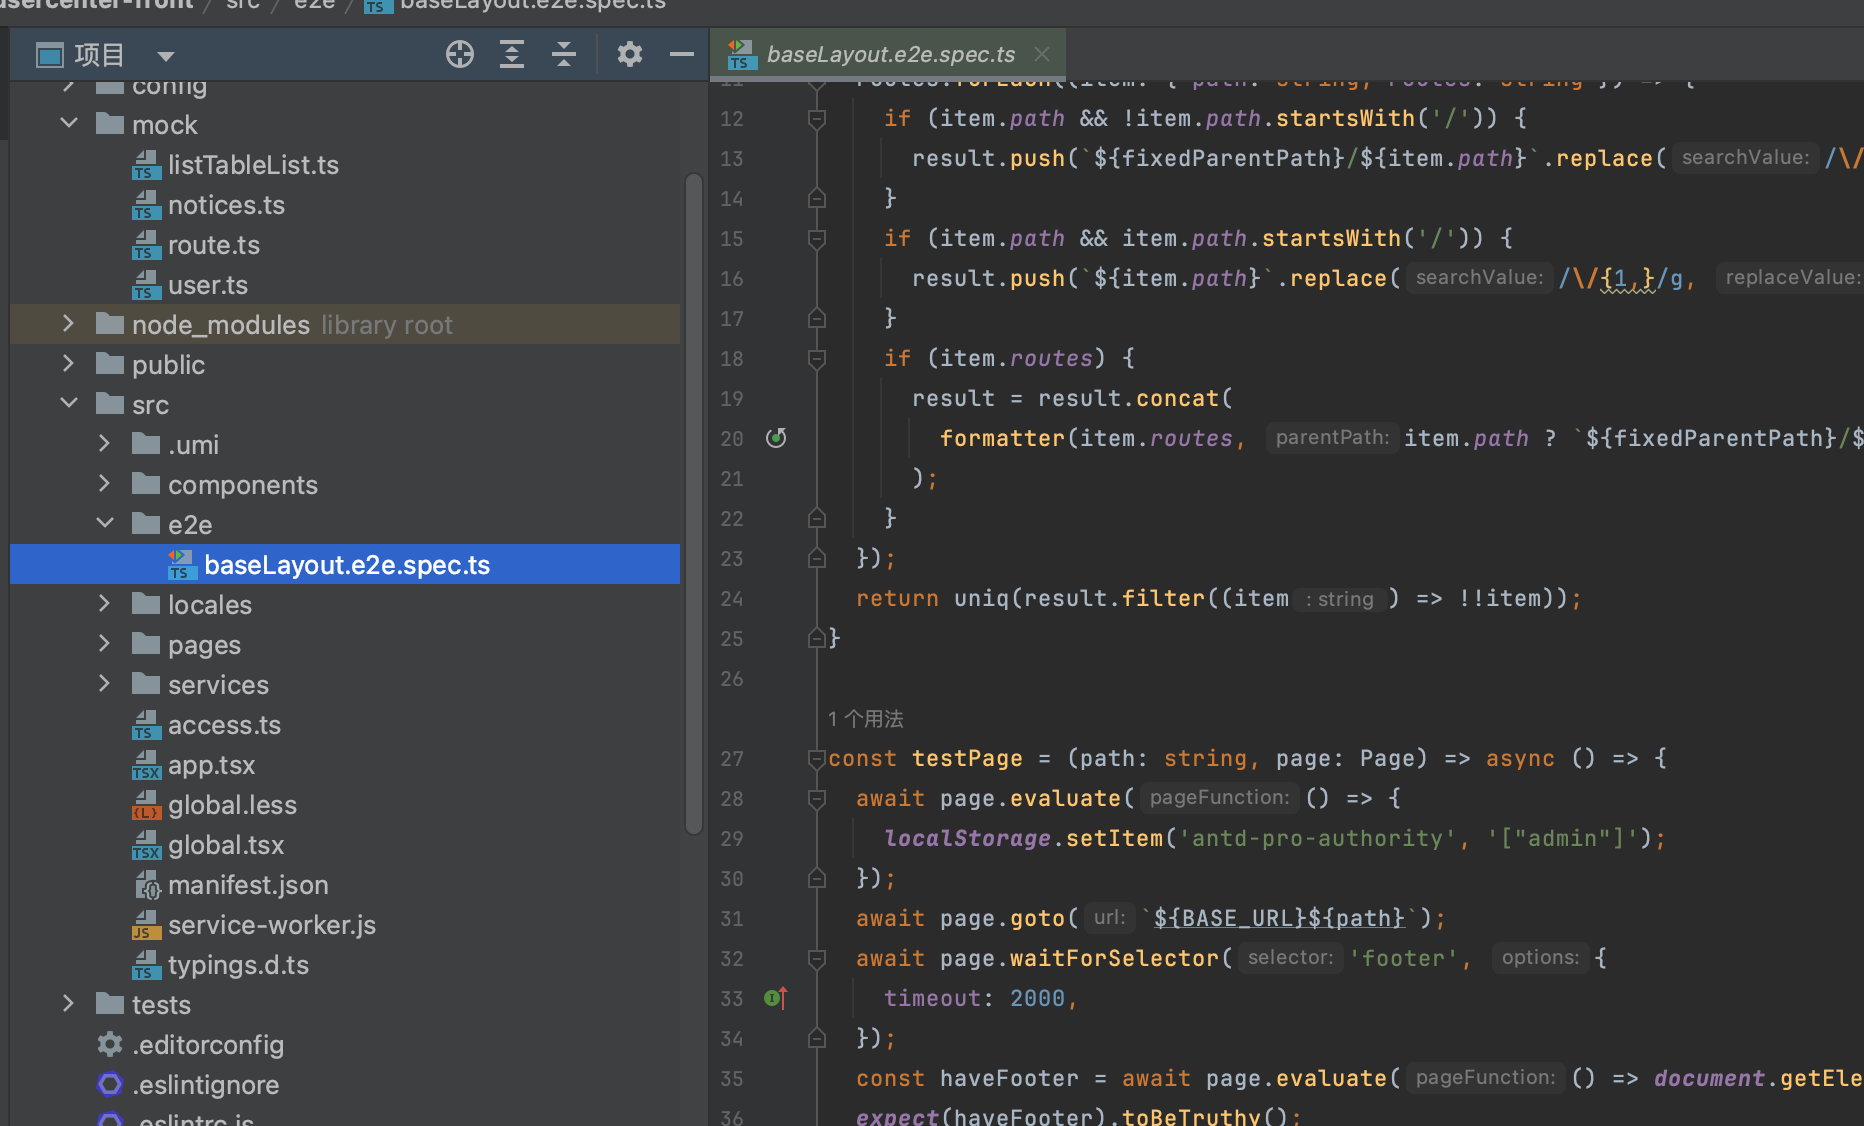
删除src/e2e文件夹,因为此文件夹是用来测试的
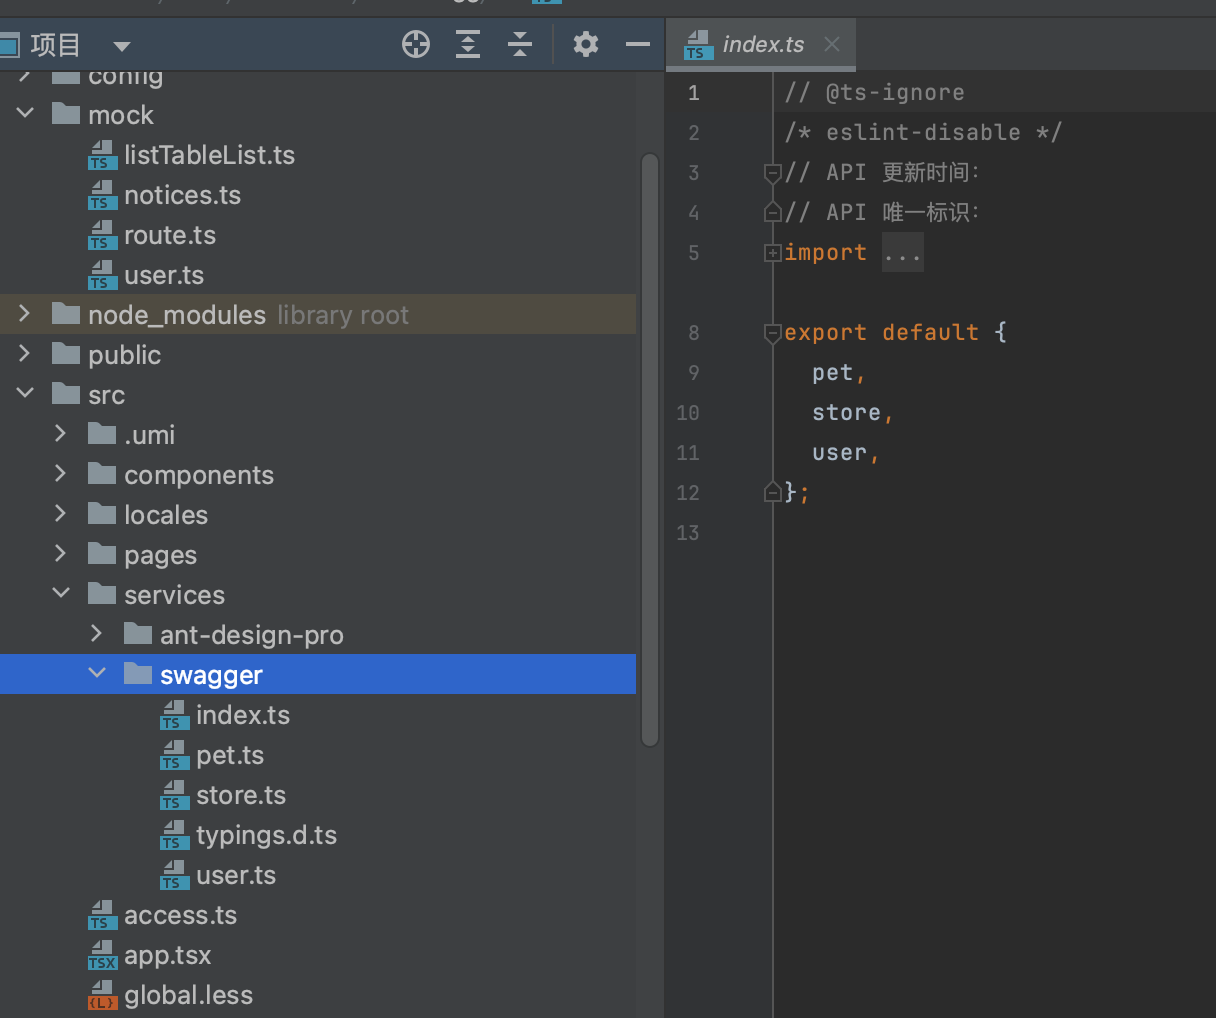
删除src/services/swagger,这是接口文档工具
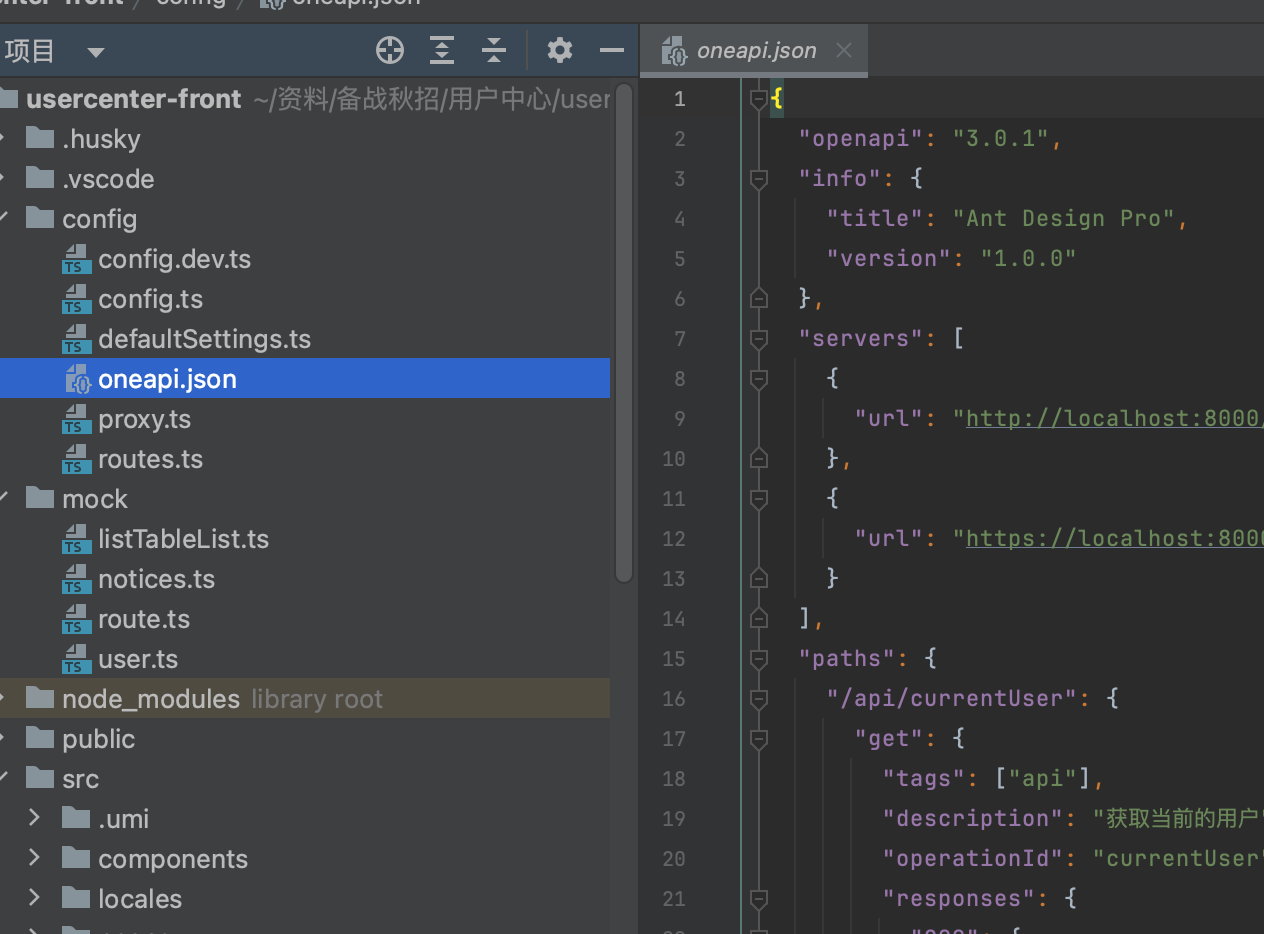
删除config/oneapi.json,也是前端mock数据类似的
也需要删除配置里的关于oneapi的配置

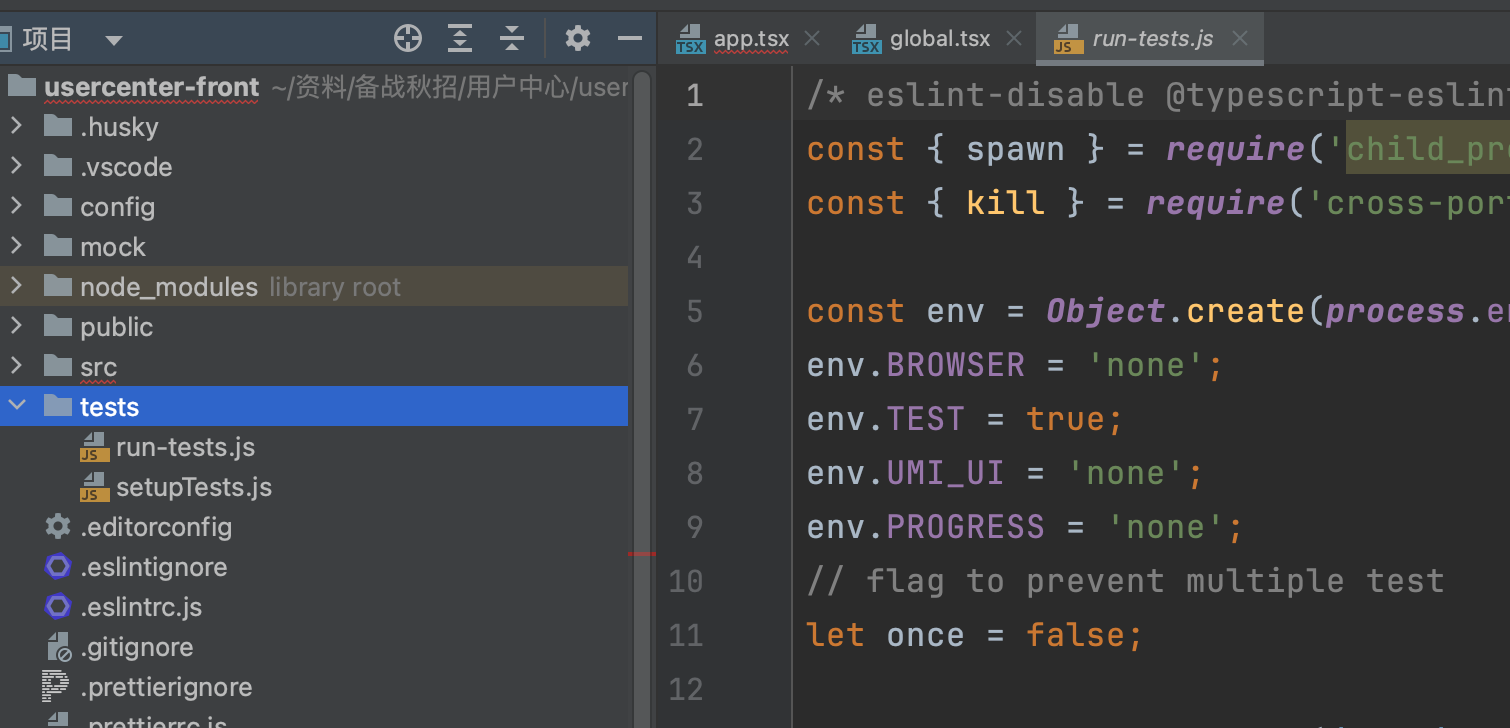
删除test文件夹,用不到测试
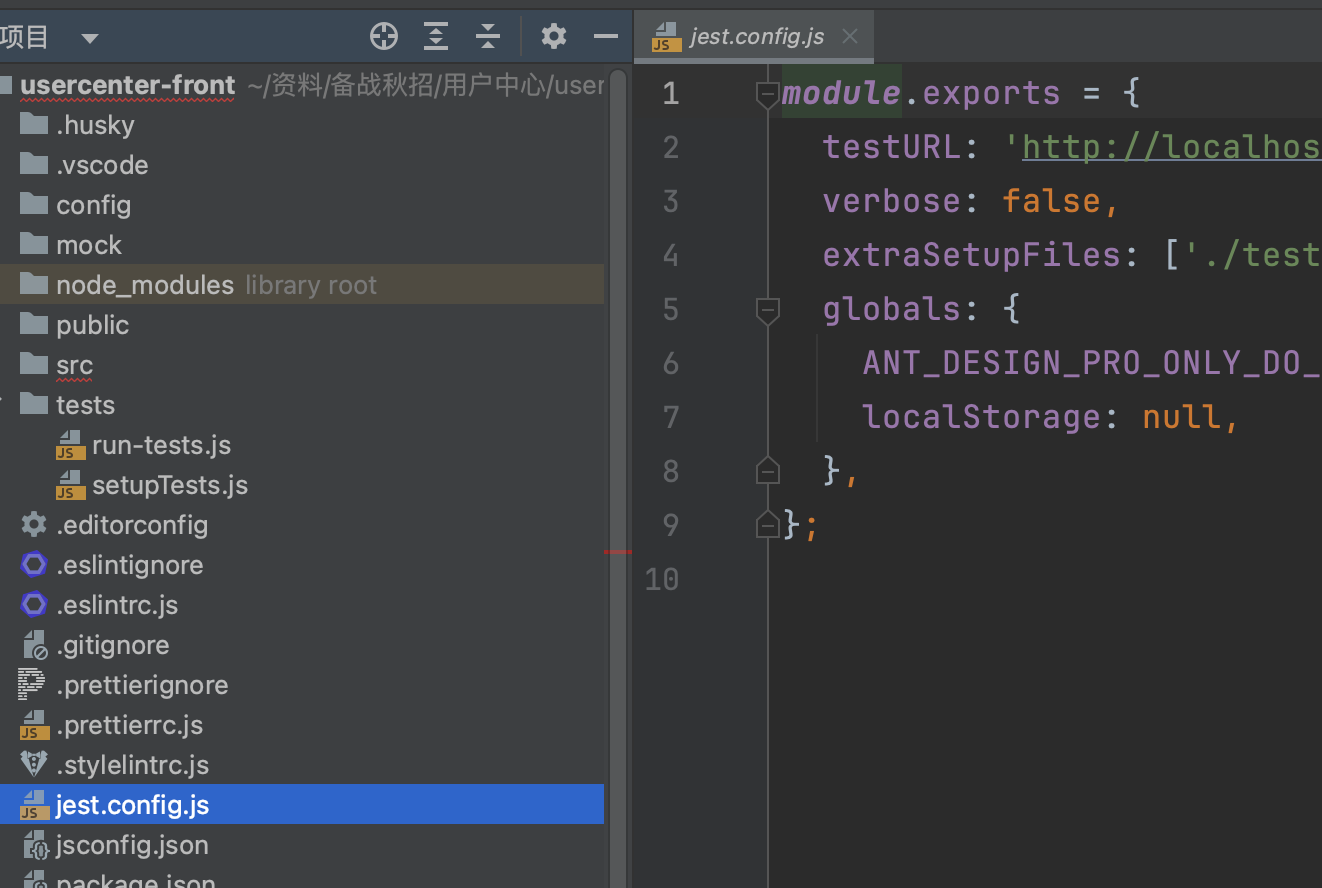
删除 jest.config.js文件,测试用的
删除playwright.conf前端用于测试的

后端初始化
三种初始化 Java项目的方式
- GitHub搜现成的代码
- SpringBoot官方模版生成器
- IDEA生成
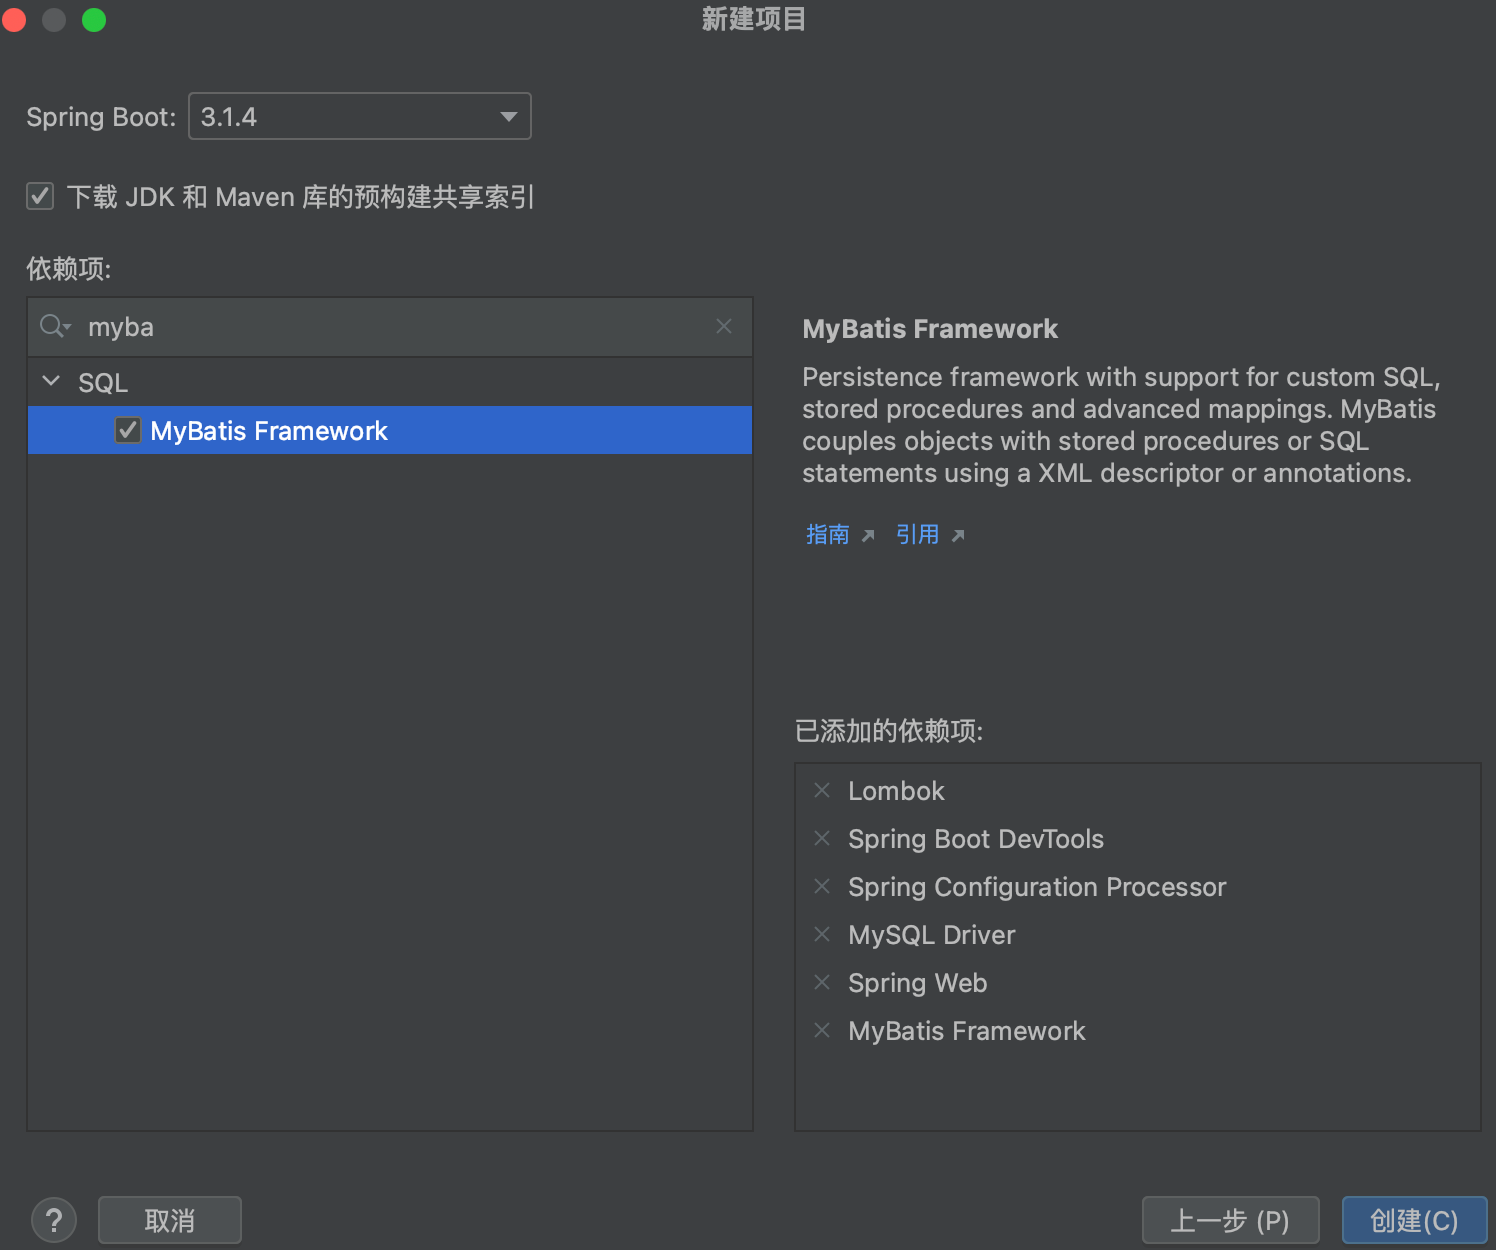
用到的依赖
maven依赖官网:https://mvnrepository.com/
Lombok
        <dependency>
            <groupId>org.projectlombok</groupId>
            <artifactId>lombok</artifactId>
            <optional>true</optional>
        </dependency>
devtools
主要用于热更新
        <dependency>
            <groupId>org.springframework.boot</groupId>
            <artifactId>spring-boot-devtools</artifactId>
            <scope>runtime</scope>
            <optional>true</optional>
        </dependency>
processor
主要用于读取配置文件
        <dependency>
            <groupId>org.springframework.boot</groupId>
            <artifactId>spring-boot-configuration-processor</artifactId>
            <optional>true</optional>
        </dependency>
MySQL
        <dependency>
            <groupId>com.mysql</groupId>
            <artifactId>mysql-connector-j</artifactId>
            <scope>runtime</scope>
        </dependency>
Spring Web
        <dependency>
            <groupId>org.springframework.boot</groupId>
            <artifactId>spring-boot-starter-web</artifactId>
        </dependency>
Mybatis
        <dependency>
            <groupId>org.mybatis.spring.boot</groupId>
            <artifactId>mybatis-spring-boot-starter</artifactId>
            <version>3.0.2</version>
        </dependency>
Mybatis-Plus
    <dependency>
        <groupId>com.baomidou</groupId>
        <artifactId>mybatis-plus-boot-starter</artifactId>
        <version>3.5.3.2</version>
    </dependency>
配置文件
application.yml
spring:
  application:
    name: user-center
  datasource:
    driver-class-name: com.mysql.cj.jdbc.Driver
    url: jdbc:mysql://localhost:3306/qiuzhao
    username: root
    password: 12345678
server:
  port: 8080
mybatis-plus:
	configuration:
  	map-underscore-to-camel-case: false
启动类上面加注解扫描mapper包:
@MapperScan("com.yunfei.usercenterback.mapper")
数据库设计
用户表:
| 字段 | 类型 | 备注 |
|---|---|---|
| id | varchar | 主键 |
| username | varchar | 昵称 |
| userAccount | varchar | 账号 |
| avatarUrl | varchar | 头像 |
| gender | tinyint | 性别 |
| password | varchar | 密码 |
| phone | varchar | 电话 |
| varchar | 邮箱 | |
| userStatus | tinyint | 0-正常 |
| createTime | datetime | 创建时间 |
| updateTime | datetime | 更新时间 |
| isDelete | tinyint | 是否删除 |
| userRole | tinyint | 0-普通用户 1-管理员 |
使用可视化界面 创建数据库:
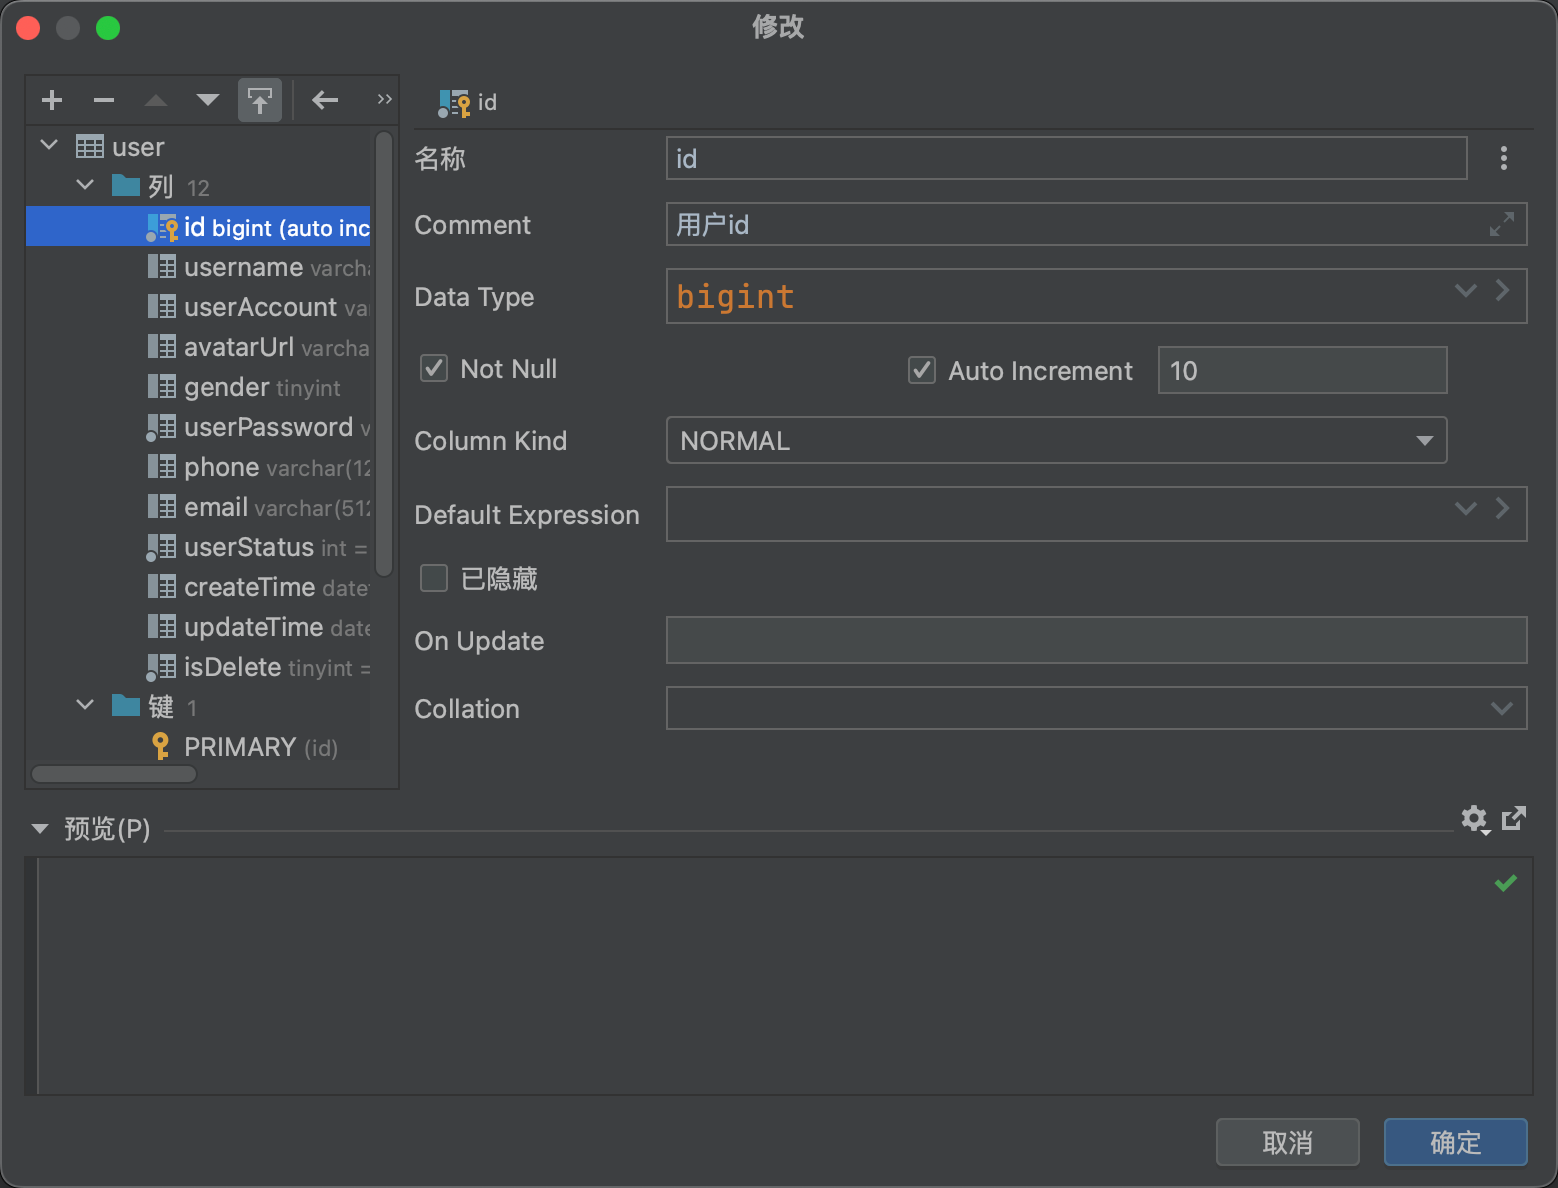
对应的SQL语句为:
-- auto-generated definition
create table user
(
    id           bigint auto_increment comment '用户id'
        primary key,
    username     varchar(256)                       null comment '用户昵称',
    userAccount  varchar(256)                       null comment '用户账户',
    avatarUrl    varchar(1024)                      null comment '用户头像',
    gender       tinyint                            null comment '性别',
    userPassword varchar(512)                       not null comment '用户密码',
    phone        varchar(128)                       null comment '点话',
    email        varchar(512)                       null comment '邮箱',
    userStatus   int      default 0                 not null comment '0-正常',
    createTime   datetime default CURRENT_TIMESTAMP null comment '创建时间',
    updateTime   datetime default CURRENT_TIMESTAMP null on update CURRENT_TIMESTAMP comment '更新时间',
    isDelete     tinyint  default 0                 not null comment '是否删除'
)
    comment '用户';
后端业务编写
代码生成器
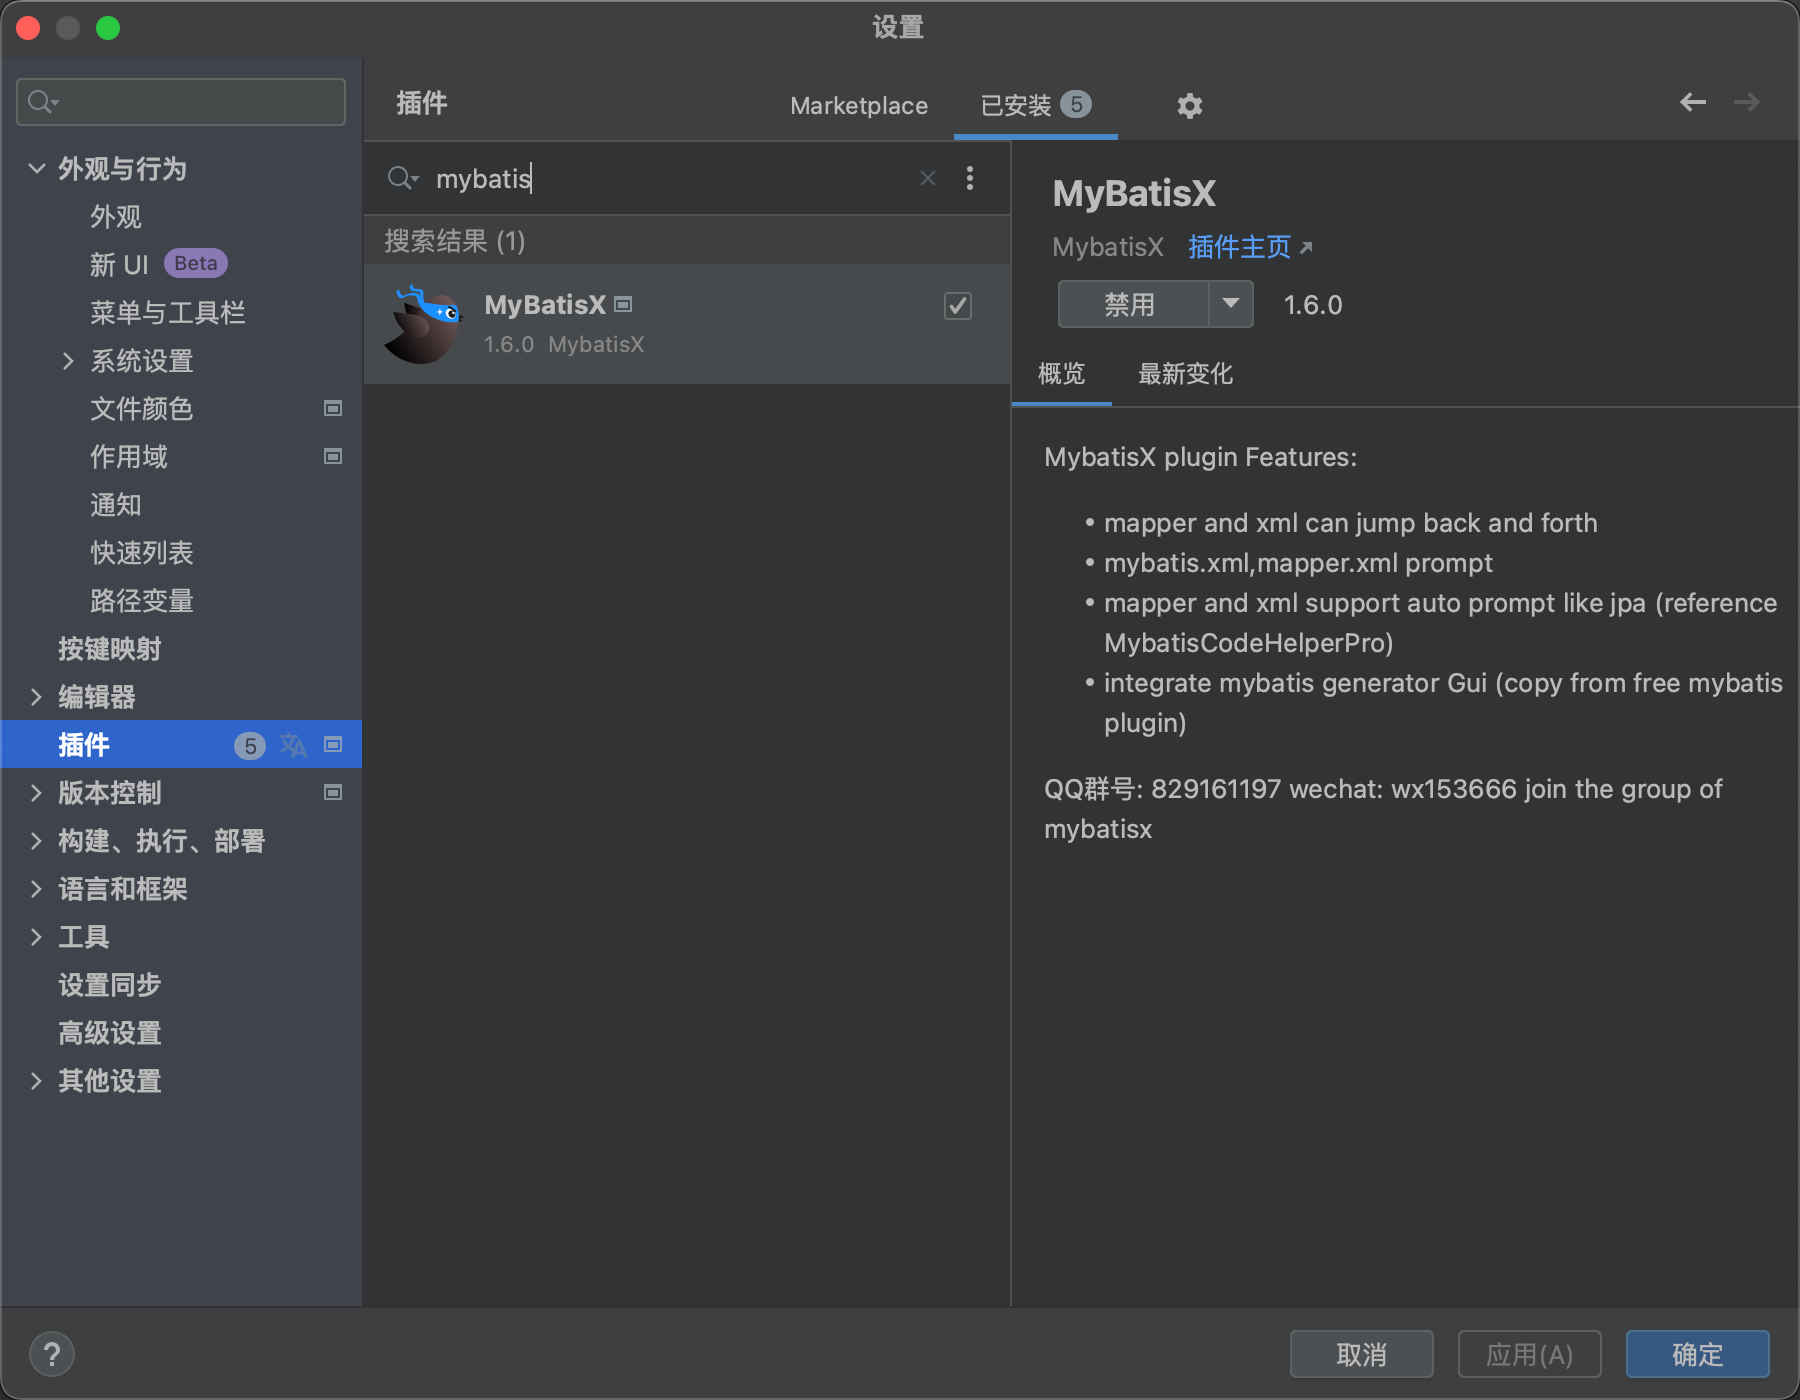
MybatisX插件,可以自动生成domain实体对象等
选择要生成的数据库的表,

如下操作:
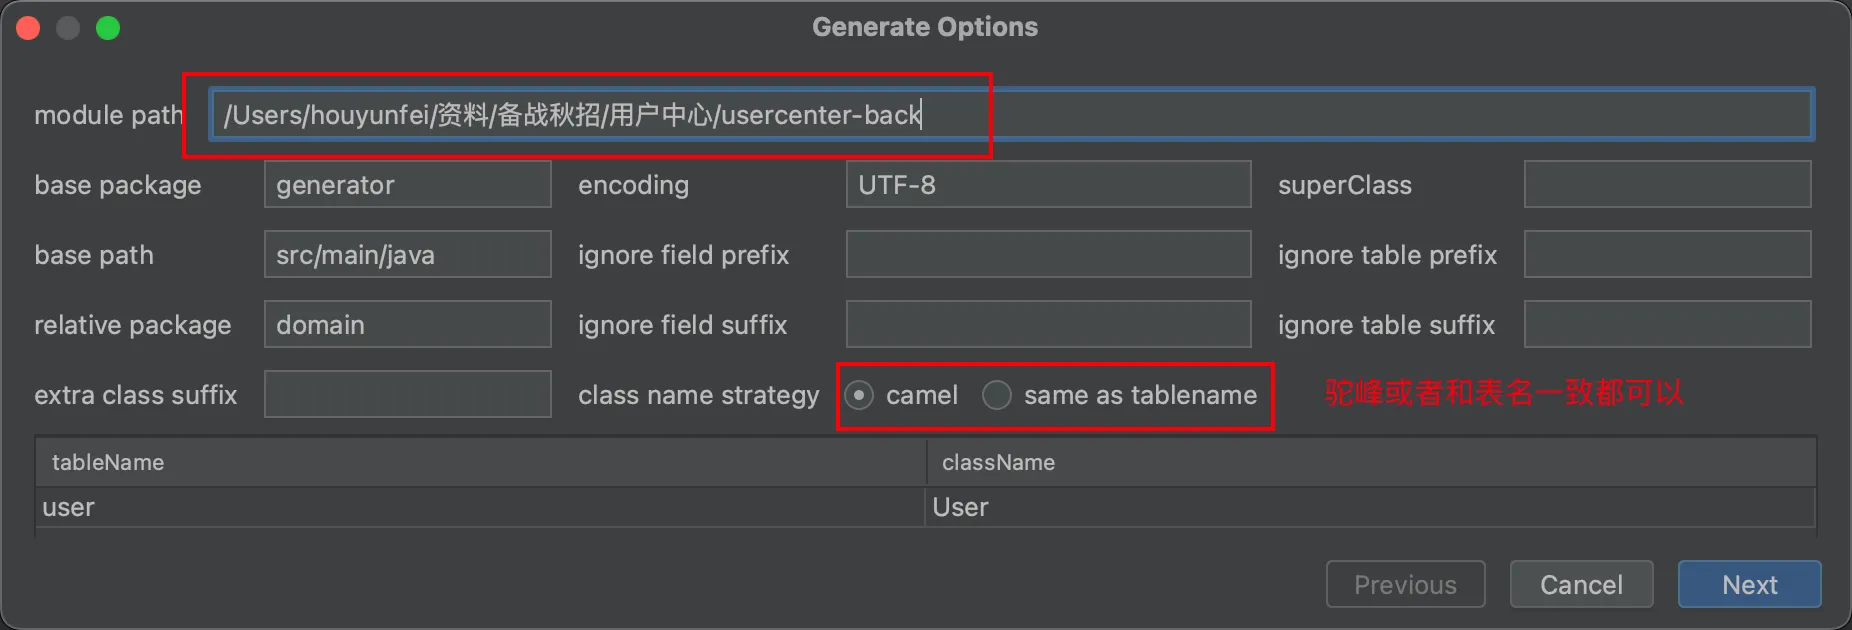
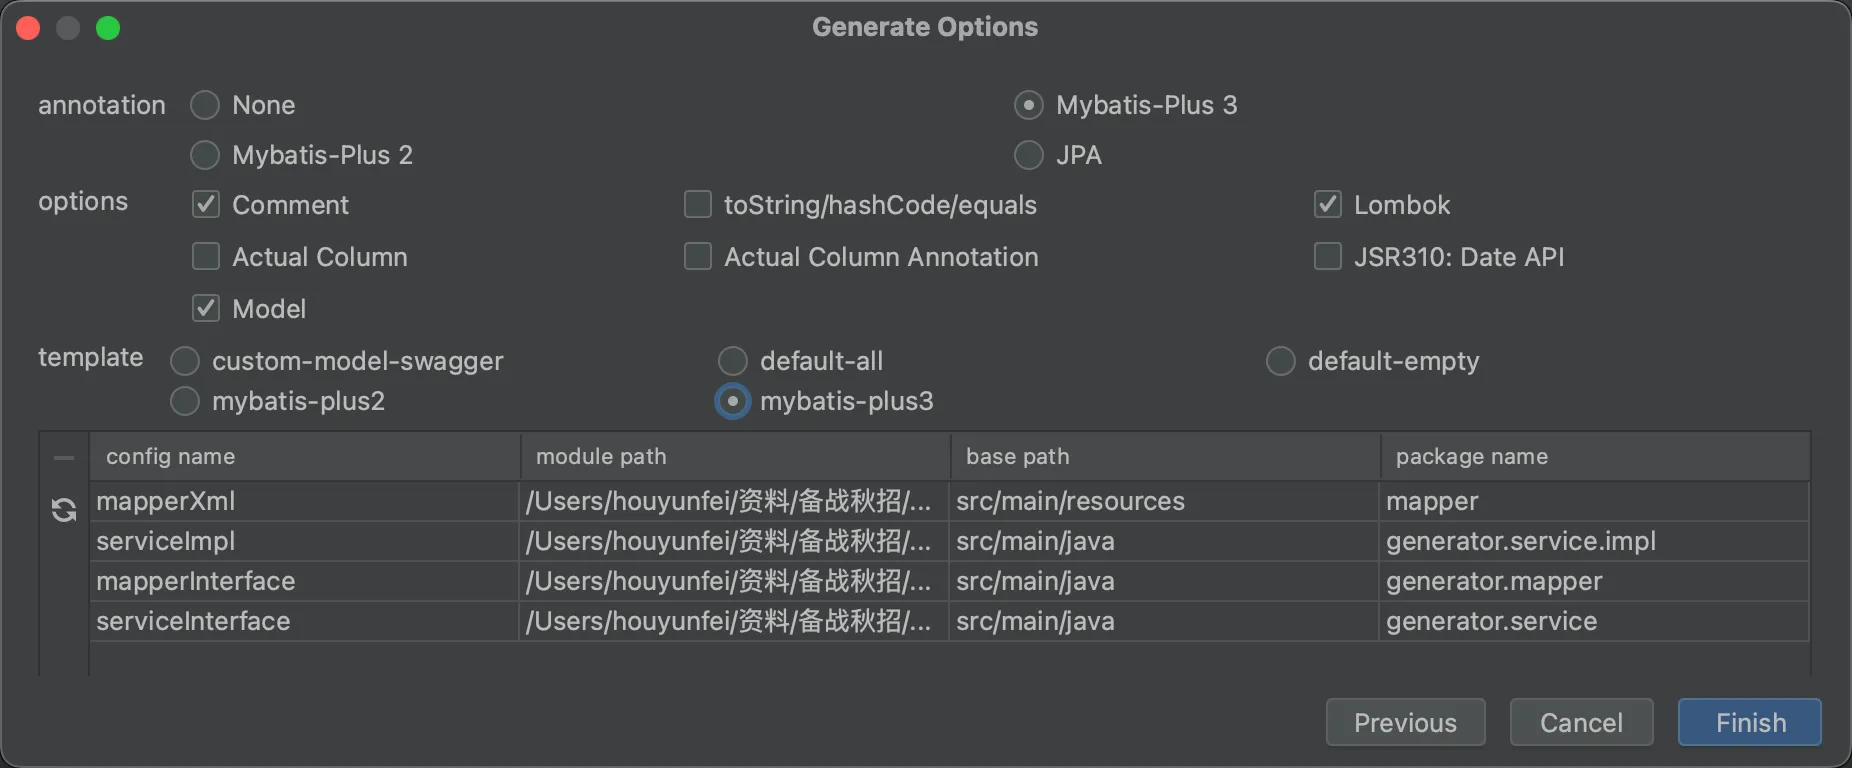
下一步,按图中的选,mybatis-plus3
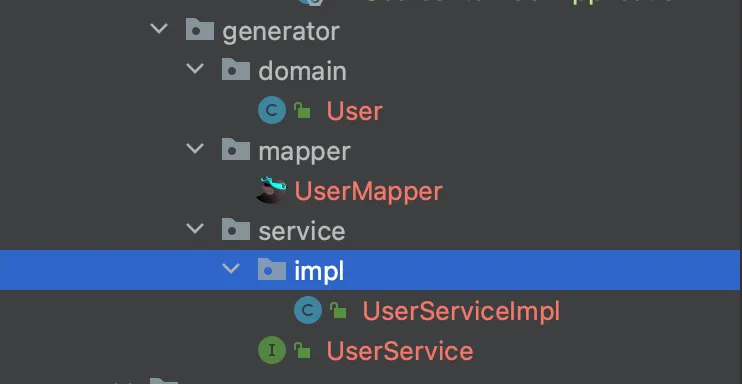
生成的代码如下:
测试生成的代码是否可行:
来个头像链接:

再来一个小的单元测试:
    @Test
    void testAddUser() {
        User user = new User();
        user.setUsername("testuser");
        user.setUserAccount("123");
        user.setAvatarUrl("https://s2.loli.net/2023/10/16/QRiUYmDLB2vZuE6.webp");
        user.setGender(0);
        user.setUserPassword("123");
        user.setPhone("123");
        user.setEmail("123");
        boolean result = userService.save(user);
        System.out.println(user.getId());
        Assertions.assertEquals(true,result);
    }
注册逻辑
- 用户在前端输入账户,密码,校验码(todo )
- 校验用户的账户,密码,二次密码是否符合要求
- 账户不少于四位
- 密码不少于四位
- 账户不能重复
- 账户不包含特殊字符
- 其他的校验
- 对密码进行加密(密码不能明文存储)
- 向数据库插入用户数据
为了进行非空校验,可以使用commons lang库进行非空校验
maven依赖如下:
        <dependency>
            <groupId>org.apache.commons</groupId>
            <artifactId>commons-lang3</artifactId>
        </dependency>
前端注册传的数据DTO:
@Data
public class UserRegisterDto {
    private String userAccount;
    private String userPassword;
    private String checkPassword;
}
Serivce接口:
    /**
     * 用户注册
     * @param userRegisterDto 用户注册信息
     * @return 用户id
     */
    long userRegister(UserRegisterDto userRegisterDto);
实现注册方法:
重点逻辑,账户不能包含特殊字符
String validPattern = "^[a-zA-Z0-9_]+$";
Matcher matcher = Pattern.compile(validPattern).matcher(userAccount);
if (!matcher.find()) {
    return -1;
}
密码进行 md5加密:
final String SALT = "yunfei";
String encryptPassword = DigestUtils.md5DigestAsHex((SALT + userPassword).getBytes());
完整代码:
public long userRegister(UserRegisterDto userRegisterDto) {
    String userAccount = userRegisterDto.getUserAccount();
    String userPassword = userRegisterDto.getUserPassword();
    String checkPassword = userRegisterDto.getCheckPassword();
    if (StringUtils.isAnyBlank(userAccount, userPassword, checkPassword)) {
        return -1;
    }
    if (userAccount.length() < 4) {
        return -1;
    }
    if (userPassword.length() < 4 || checkPassword.length() < 4) {
        return -1;
    }

    //账户不能包含字符
    //账户不能包含特殊字符
    String validPattern = "^[a-zA-Z0-9_]+$";
    Matcher matcher = Pattern.compile(validPattern).matcher(userAccount);
    if (!matcher.find()) {
        return -1;
    }
    //密码和确认密码必须一致
    if (!userPassword.equals(checkPassword)) {
        return -1;
    }
    //账户不能重复
    QueryWrapper<User> userQueryWrapper = new QueryWrapper<>();
    userQueryWrapper.eq("userAccount", userAccount);
    long count = userMapper.selectCount(userQueryWrapper);
    if (count > 0) {
        return -1;
    }
    //加密
    final String SALT = "yunfei";
    String encryptPassword = DigestUtils.md5DigestAsHex((SALT + userPassword).getBytes());

    //插入数据
    User user = new User();
    user.setUserAccount(userAccount);
    user.setUserPassword(encryptPassword);
    int result = userMapper.insert(user);
    if (result < 1) {
        return -1;
    }
    return user.getId();
}